Showing posts with label surgical instruments. Show all posts

Thursday, April 11, 2013

Keeping Track of an Artifact’s Condition


     This week saw the return of some artifacts which had been out on loan to the B&O Railroad Museum in Baltimore.  They were on display there as part of their exhibit, The War Came by Train.  The items on display in this exhibit are changed each year, so it is still open.  You can see some more information about it here.
     You might think that getting an artifact back would simply involve putting it back in its designated storage area, but it is a little more involved than that!  There are loan papers which have to be signed by both institutions of course, and the artifact needs to be inspected to ensure that it has not been damaged.  To aid with this, a document called a condition report is completed for each artifact that goes out on loan.  The condition report includes a written description as well as photographs of the artifact to document the artifact’s condition.  The artifact’s overall condition is assessed, and any damaged areas are noted.  When the artifact is returned, a new condition report is completed to assure that it is in the same condition as when it was loaned.


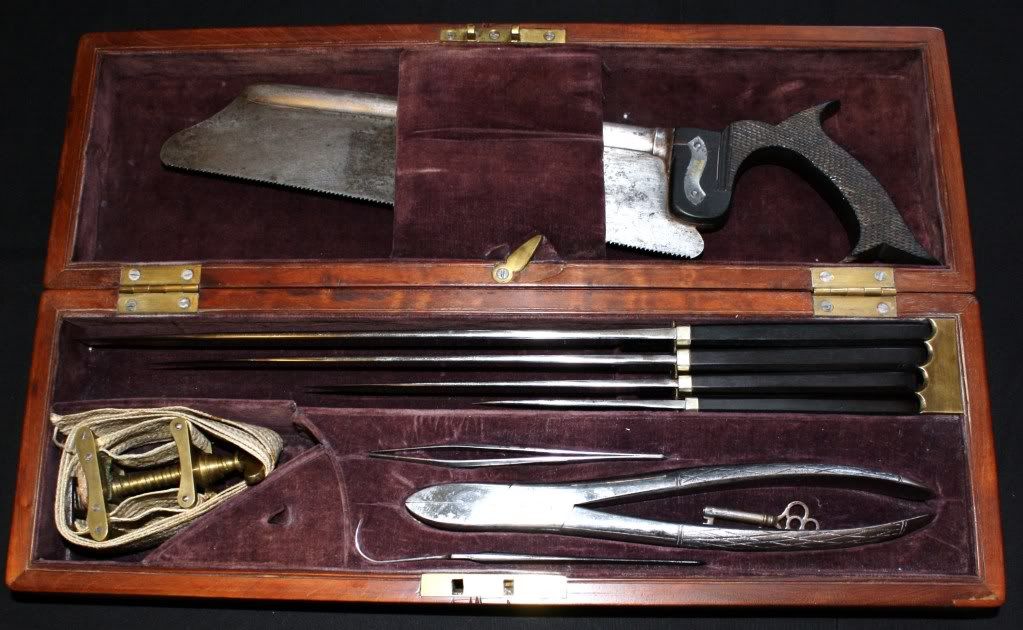
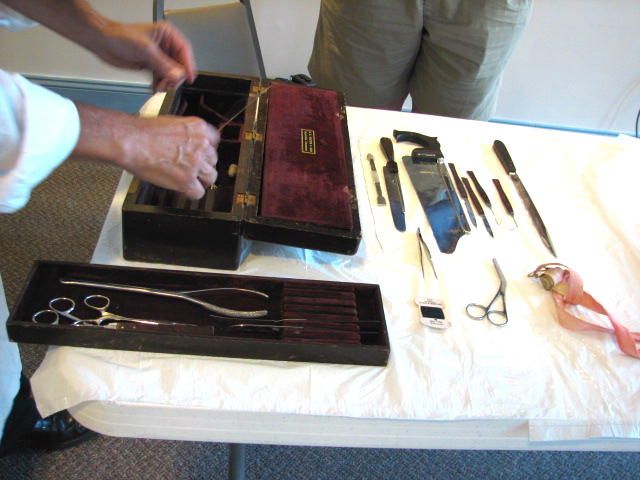
This surgical kit is one artifact which was just returned to my museum.  The overall condition of this kit was assessed as Very Good. 


      In the physical description on the condition report it is noted that the manufacturer is Young & Co. and that the kit was made around 1850.  The case is made of varnished rosewood and has an inset brass cartouche on the lid, and a lock on the front of the case.  The kit includes ten surgical instruments and a metal, clover-topped key.  The kit interior is lined with dark purple velvet, and is custom fitted for the medical instruments, with a small lidded compartment for needles.  It was also important for me to note that though the amputation saw is of the same era as the rest of the instruments, it is not original to the kit.  The kit’s exterior measurements of 17" long, 5 1/2" wide, and 3" deep are included, as well as the types of materials which make up the kit (wood, metal, and cloth).  This helps the borrower plan for the correct exhibit conditions and mounts for the artifact.


A photograph of the kit’s interior is added to the report as well. 


     Another important section of the condition report documents any damage, markings, or fragile areas on the artifact.  For this kit, there were some scratches and cracks in the wood which I needed to measure and report.  I also noted that the velvet lining the interior was faded and starting to fray just a bit at the edges.
 
 
This crack on the bottom of the case was pretty obvious.  I added the scale to document the size of the crack.  I need to know if the crack starts expanding!


It’s also important to document things like this gap between the lid and base of the case.  


     If you are thinking like a collection manager or curator, you may be wondering why I only mentioned the number of surgical instruments in this kit, but didn’t mention anything about their condition.  This is because each instrument gets its own condition report.  That makes a total of eleven condition reports I have to do just for this one surgical kit!  Though it's a little tedious and time-consuming, this is the best way to ensure that each instrument is properly documented.
 
 
You can be sure that I will mention the chip in the wood on this amputation saw handle in its condition report!


   Once the condition reports have been completed, the artifacts must remain in the quarantine area for 30 days before they can be returned to their storage places in the collection room.  During this time, I have to monitor them for any insect infestations, mold or mildew growth.  Artifacts are quarantined any time they have been out on display – even when they are displayed here at the NMCWM.  Even if the likelihood of them being infested is very low, it is still worth it to ensure that nothing is brought into the collection room to infest the rest of the collection.

     Now if you’ll excuse me, I have some condition reports to finish! 

 
Photos courtesy of the National Museum of Civil War Medicine.

Thursday, January 17, 2013

Amputation Instruments


     There’s a story the Director of our museum (George) likes to tell about overhearing two people on the street debating over whether or not to visit the museum.  The wife was looking in the front window and commenting that she’d like to take the tour.  Her husband replied, “Civil War medicine?  It’s just a saw!”  At that point, George stepped up and offered to show them the museum, as well as how much more there was to Civil War medicine than an amputation saw.


Here is what most people associate with Civil War medicine - an amputation kit. This is a nice example of an amputation kit with a rosewood case and the basic instruments (including the saw!) needed to perform an amputation.  


       Sadly, this has been the image of Civil War medicine for quite some time.  Even during the war, the surgeons were judged to be “butchers” for performing so many amputations.  The image has persisted through the years, and many people still have the idea that Civil War surgeons were heartless and incompetent.  The simple truth is that these surgeons were saving lives in the best way that the knowledge and technology of the time allowed.

     There is no doubt that amputations were a big part of Civil War medicine though. So, let’s take a look at some of the instruments that were used.
 
 
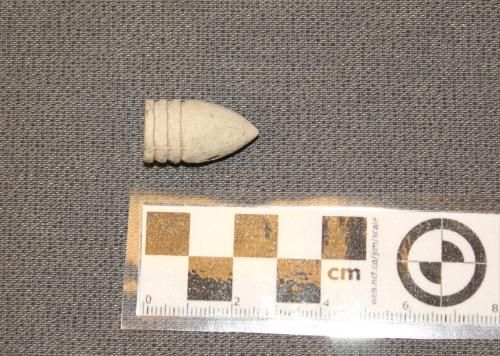
This is the culprit responsible for the necessity of so many amputations - the MiniĆ© ball. These bullets caused tremendous damage to soft tissue and to bones. One medical textbook of the time describes the damage as
“….truly terrible; bones are ground almost to powder, muscles, ligaments, and tendons torn away, and parts otherwise so mutilated, that loss of life, certainly of limb, is almost an inevitable consequence.”
 

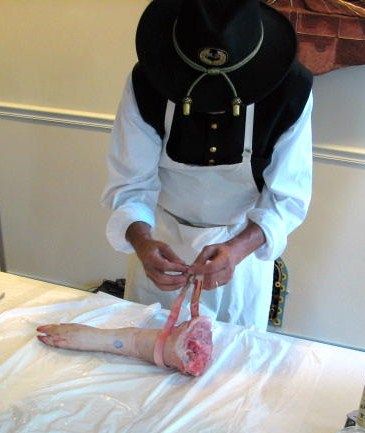
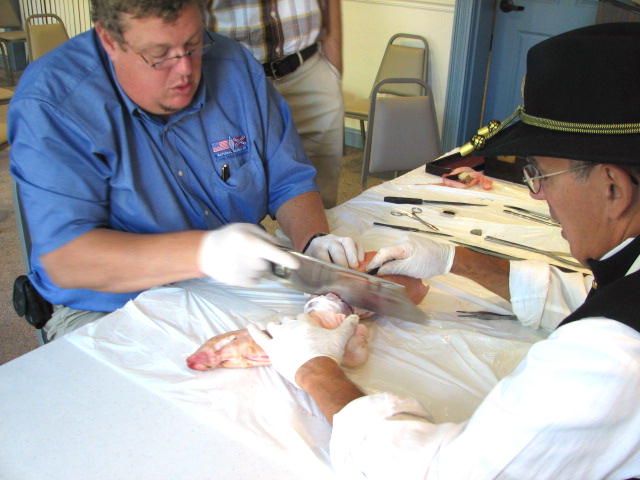
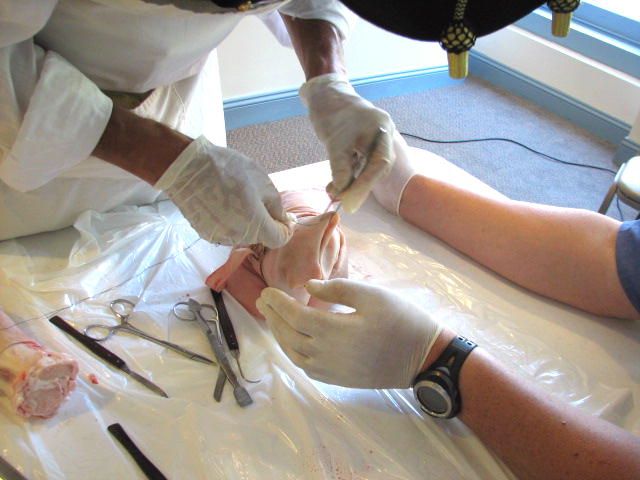
One of our volunteers is a present-day surgeon, even though he dresses as a Civil War surgeon at the museum! He took our Director, George, through the amputation process, using a pig leg. 
Don’t worry; even though those instruments look old, they are actually reproductions of Civil War instruments. I wouldn’t let them use the real ones! 


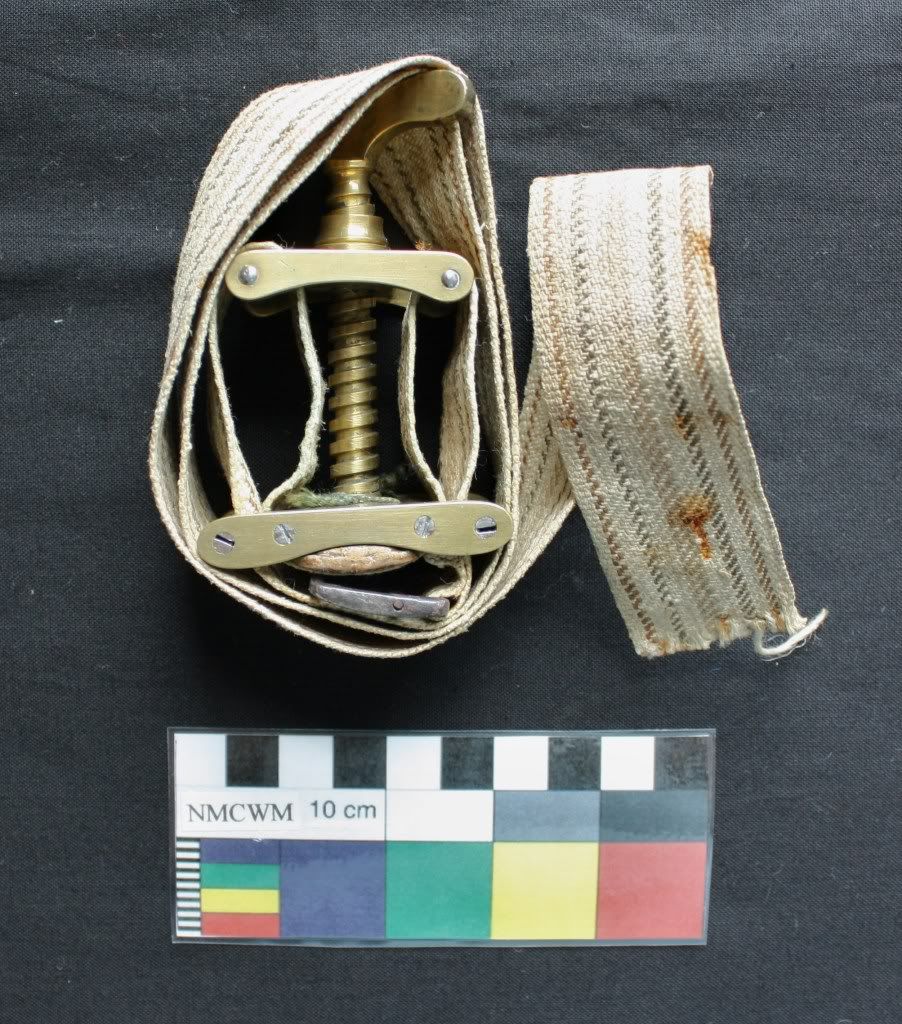
Normally the first step in an amputation was to anesthetize the patient, but obviously that was unnecessary for this“patient.” The next step would be to apply a tourniquet to the limb above the wound, to stop or slow the bleeding.


Here is an example of a Petit’s screw tourniquet, which would have been used in the Civil War.


     There were two main methods of amputation used in the Civil War.  The flap method left flaps of skin and muscle which would be used to cover the stump at the completion of the operation.  A V-shaped cut would be made, and then the bone would cut away a few inches above the flaps.  In a circular amputation, the surgeon basically cut in a circle around the limb, would draw back the skin slightly and then cut straight across the bone. 

 
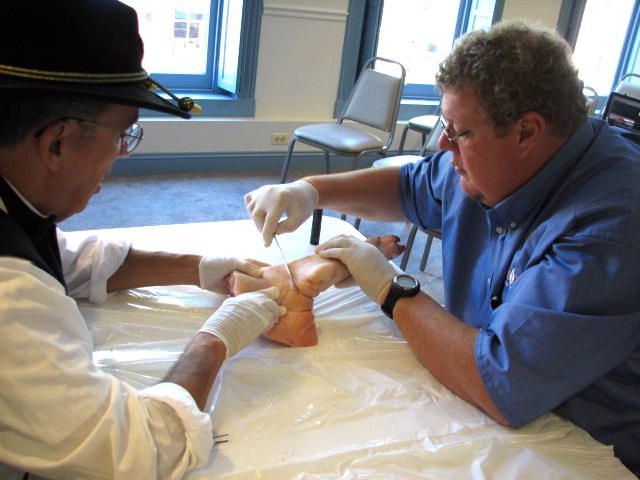
George uses an amputation knife to make the first incision through the skin and muscle. Afterwards, the skin and muscle will be pulled back slightly from the bone. 
 I will point out here that Civil War surgeons did not wear gloves.

 
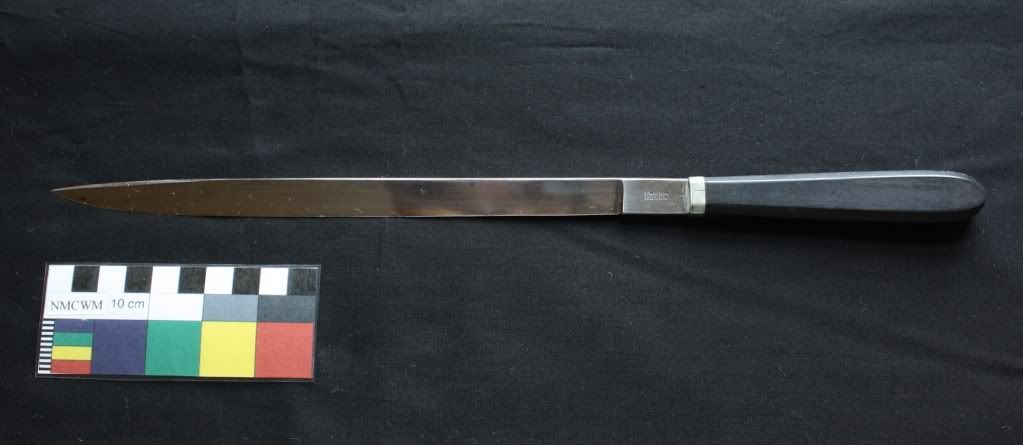
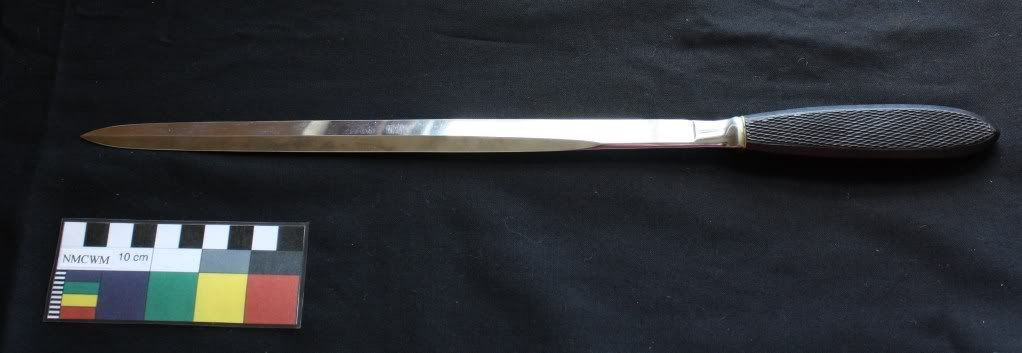
This amputation knife is similar to the one being used in the photo above. Single-edged amputation knives were used for circular amputations.

 
This double-edged amputation knife is called a catlin. It was more commonly used in flap amputations.


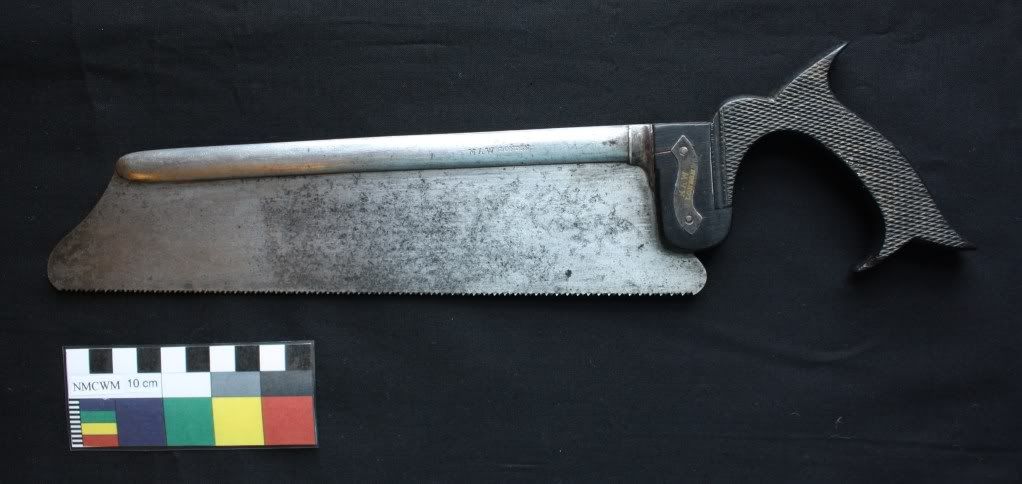
The amputation saw was used just to cut through the bone.


This is a typical amputation saw with a “fishtail” handle. The checkered texture on the handle gave the user a better grip. Operating quickly was important. There was less chance of shock to the patient, and it allowed the surgeon to move on to the next patient quickly. Most amputations were done in less than ten minutes!


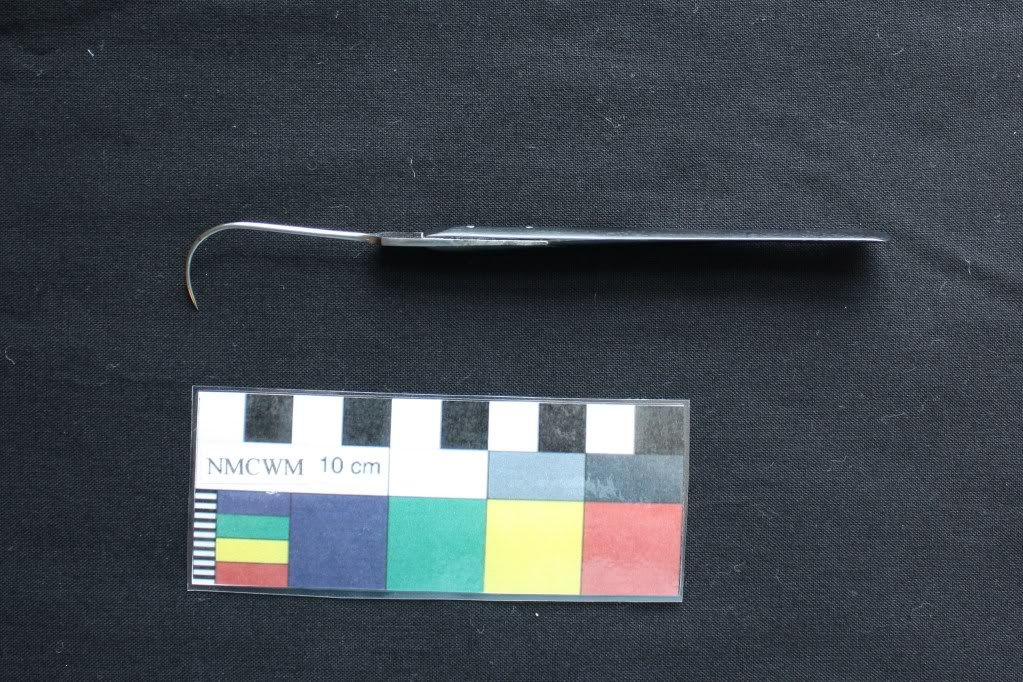
With the amputation completed, the surgeon would use a hooked instrument called a tenaculum to pull out the large blood vessels to be tied off.


Here is a closer view of a tenaculum.


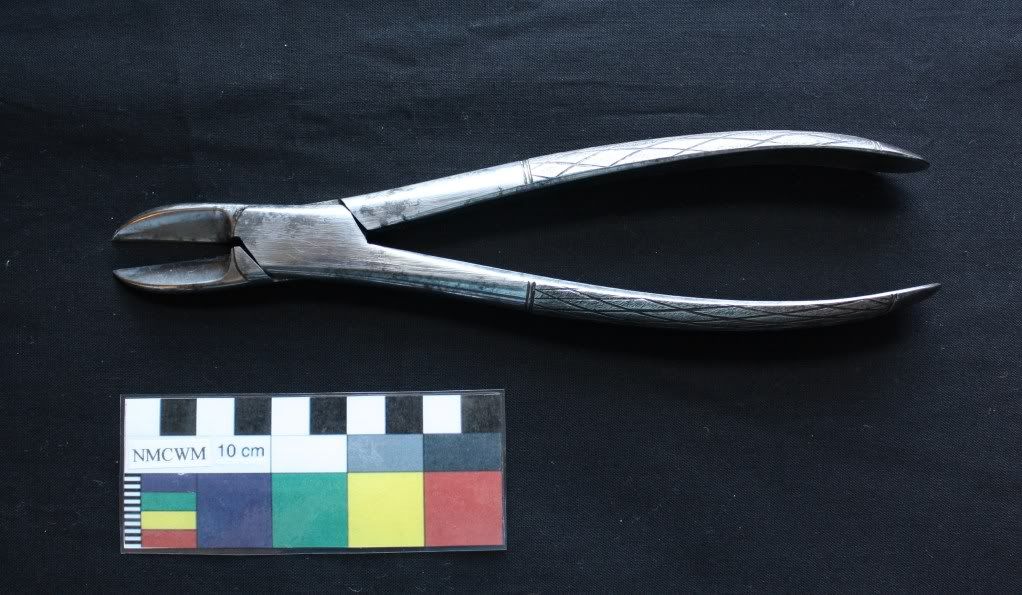
This instrument, called a rongeur, would be used to remove any sharp edges from the bone before closing the wound. A bone file could be used to help smooth the bone too.


And finally, the flaps of skin would be sutured together. Often, an opening would be left to allow the wound to drain. Bandages would be applied to the stump.


Surgical needles haven’t changed much since the Civil War!

 
     To learn more about Civil War amputations click here.
      
     I’ll leave you with a quote from the medical director of the Army of the Potomac, Dr. Jonathan Letterman, who wrote in his report after the battle of Antietam,
“The surgery of these battle-fields has been pronounced butchery. Gross misrepresentations of the conduct of medical officers have been made and scattered broadcast over the country, causing deep and heart-rending anxiety to those who had friends or relatives in the army, who might at any moment require the services of a surgeon.
 It is not to be supposed that there were no incompetent surgeons in the army. It is certainly true that there were; but these sweeping denunciations against a class of men who will favorably compare with the military surgeons of any country, because of the incompetency and short-comings of a few, are wrong, and do injustice to a body of men who have labored faithfully and well.”


Photos courtesy of the National Museum of Civil War Medicine.
Thursday, August 9, 2012

A Pocket Surgical Kit

     We received an exciting donation recently of a collection of pocket surgical kits.  These small leather kits were carried by surgeons during the Civil War and contained the instruments they were most likely to need out in the field.  These instruments are smaller than the ones found in the surgical or amputation kits.  Many of these instruments were also designed to be folded into their handle when not in use, to make for a more compact kit.  There are several sizes of pocket kits, depending on the types and number of instruments they contained.  Let’s take a closer look at one kit and its contents.


This pocket kit was made by George Tiemann & Co. The exterior of the case is leather and the interior is lined with purple velvet and cloth. The flaps you see on the sides fold in to protect the instruments when the case is closed. You can see that the top flap of the kit is now detached, but the instruments are in very good condition.


     The George Tiemann company, located in New York City, was a major supplier of surgical kits and instruments to the Union army during the Civil War.  His company is still in business today.  According to their website, they have been suppliers of “fine surgical instruments” since 1826. 


In addition to having loops for storing instruments, this kit also has a pocket where the surgeon could keep his needles and suture materials.


This is a double-bladed gum lancet and tenaculum with a tortoise shell handle. The small metal buttons slide to the side to lock the blades in place. As you might suspect, a gum lancet was a dental tool used for making incisions. The tenaculum, the sharp hook, was a type of probe generally used for grasping and holding blood vessels.


This double-bladed instrument is probably recognizable as two scalpels, used for making incisions.


This odd-looking little instrument is a comb and lancet, used for blood-letting and vaccinations. During the Civil War, doctors would vaccinate soldiers against smallpox using scabs from a person who had been infected with the disease. The lancet or the comb would have been used to make little incisions in the arm in order to insert small bits of the scabs. 


This metal instrument is a grooved director. It was used for directing another surgical instrument, such as a scalpel, to an area that was not in the surgeon’s direct view.


Metal olive-tipped artery forceps enabled the surgeon to grip an artery. A ligature with an overhand knot could be slipped down the forceps to the artery. A small metal slide allows the forceps to be locked closed.


     I am still cataloging and documenting this kit and the rest of the collection, but I’m looking forward to putting them on display in the future!


Photos courtesy of the National Museum of Civil War Medicine.
Thursday, June 28, 2012

Trephination


     Most people associate Civil War medicine with amputations and saws.  There were a lot of amputations performed when bones in the arms or legs were shattered, and in most cases it was the best method of treatment they had.  But what happened to the soldiers who suffered skull fractures?  Amputation would not be a good treatment in this case!
     Civil War surgeons would have reached for their trephining (or trepanning) kit.  Trephining is a procedure in which a cylindrical saw-like instrument called a trephine is used to cut a hole into the skull in order to relieve pressure on the brain or remove a blood clot.  This is a procedure which predates the Civil War.  In the Middle Ages it was used as a remedy for headaches, seizures, and “evil spirits”.  Some prehistoric human skulls have even been found with evidence of trephining.  


This is a diagram of a trepanning kit from an 1860 Snowden & Brother catalog (Philadelphia) which lists the instruments that were contained in the kit. Take a look at those prices too!

     
     The scalpel would be used first to cut a flap of skin from the area.  Next the trephine would be used to cut a hole in the bone.  Many trephines have a spike (identified as the "sliding centre" in the diagram) which was used to hold the instrument in place while it was rotated. 
    

This trephine is actually made in two parts. The wooden handle is removable and can be used with trephines of different sizes. The small round handle on the metal shaft is used to control the depth of the spike inside the blade.


Here you can see the spike that was used to anchor the blade in place.


     Another instrument which was used to reduce skull fractures was a Hey's saw.  It has a double-edged blade with one flat side and one curved side.  Once you've seen one, you'll easily recognize other Hey's saws.


The Hey’s saw was named after an English surgeon, William Hey.


A small bone brush was used to remove any bone dust produced by the saws. This one has a wooden handle and natural bristles.


Next an instrument called an elevator was used to raise or remove the portions of bone which were putting pressure on the brain. 


     Some symptoms of pressure on the brain from a skull fracture which have been noted in case studies are loss of consiousness, convulsions, headache, nausea, paralysis, and confusion.  In some cases, the symptoms would disappear shortly after a trephination.  Overall though, there was a pretty high mortality rate for these patients; less than half of them survived the procedure.

     If you are curious you can read about some actual trephining cases from the Civil War here: 
http://www.braceface.com/medical/Civil_War_Articles/Trephining_during_Civil_War.htm
    

     Though I would love to be able to purchase a trephining kit for the museum at the Civil War era prices listed above, it appears that price would only get me the following item:


     I wonder what a Civil War surgeon would have thought of this....

     Photos courtesy of the National Museum of Civil War Medicine


Thursday, April 5, 2012

They Used Chainsaws in the Civil War?

    
     I get quite a few questions about Civil War surgical instruments so I thought I’d write about some of them.  Today I’ll focus on the ones which used chains. 

     Chain saws were used to cut, or resect, bones.  The saw consists of a flexible chain blade with detachable handles.  The chain could be positioned by using a carrier needle and thread tied to one end of the chain to draw it behind the bone.  The handles were then attached and the surgeon pulled the handles back and forth rapidly until the bone was cut in half.  It may sound a bit barbaric, but it was quite effective.

Here is the chain portion of a chain saw. The small links allow the chain to flex and conform to a variety of shapes. Though it’s difficult to see here, the links also have sharp teeth along one edge for cutting through bone.

This is one of a pair of wooden chain saw handles. You can see the hook where it can be attached to the chain.


     Now let’s look at another chain from the Civil War.  The item in the photo below looks pretty wicked!  What do you think it is?  People tend to guess that they are fishing hooks, but I can assure you that this is actually a medical item.  Fortunately though, it is not an item you should see in your doctor’s office!

This is a post-mortem retraction chain, which was used to hold back tissue during an autopsy. These could found in surgical kits and post-mortem kits.
    

     The next instrument looks a bit like a chain saw, but it was not intended to cut through bones.  It is called a Chassaignac's Ecraseur and it was originally designed for removing hemorrhoids!  It also was used for removing uterine tumors or polyps.  Notice that the links are larger than the ones on the chain saw and that they don’t have teeth.  It functioned by gradually crushing the tissue, which resulted in less blood loss than if the tissue had been cut. 
The handle of the ecraseur could be turned to lower the chain through the metal loop at the end of the instrument. The chain could then be placed around the hemorrhoid or tumor and tightened by turning the handle in the opposite direction until the tissue was severed. 

    
     It’s ok if you are wincing now - I’ll save the rest of the surgical instruments for other posts!


Photos courtesy of the National Museum of Civil War Medicine.
Thursday, March 8, 2012

The Mystery Saw


      This mystery artifact is different from the ones in previous posts because it is a mystery to me as well!  The saw in the photo was donated to the museum a few years ago.  The donor said it was a “cranium saw” and that the unusual blade was designed to cut through the skull.  None of us at the museum had ever seen anything quite like it though! 

Here’s my mystery saw. It has a steel blade and wooden “fishtail” handle. There are no markings on it to indicate a maker.   And look at that large, thick back!


     The saw does appear to be from the Civil War period.  The handle and blade shape are consistent with the capital saws of the time.  The thick back and the extremely short depth of the cutting surface are unusual though.  So, I set out to do some research.


Here you can see the handle of the mystery saw more closely.


This capital saw with a somewhat similar handle and blade shape belonged to Jeremiah E. Holmes, Acting Assistant Surgeon U.S.A (1864-1865).  The thinner reinforced back on this blade is more typical of a Civil War capital saw.


Here’s a pre-war capital saw with a very similar fishtail design handle.

     I looked through quite a few books and catalogs.  I checked some online sources.  I even checked out woodworking saws, as it is somewhat similar to a dovetail saw.  It does appear to be some sort of medical saw at least, but that’s as far as I got.  It didn’t match anything I found.  So, I started making inquiries at other museums.  It stumped everyone!  So far, the most reasonable conclusion has come from the folks at the Mutter Museum, who said it looked like some sort of autopsy saw.


A close-up of the blade. This saw is designed to cut only 3/8” deep. The very thick back also makes the blade very rigid.


     It is possible that this saw was made to order for someone, and that it doesn’t really have a name.  I don’t like unsolved puzzles though, so I keep looking and asking.  Maybe someday I’ll get my answer.  Or maybe it will always be the mystery saw.


Photos courtesy of the National Museum of Civil War Medicine.