I’ve mentioned
before that displaying artifacts is a sort of balancing act. I have to weigh the requirements for
preserving and protecting the artifact with the need to have it on display. Though the artifacts would last longer if kept
in storage, they wouldn’t be available for people to see, appreciate, or
study. So, when artifacts are stable
enough to display, I try to ensure that they are displayed in a manner that
does the least amount of damage.
However, on occasion I do have to deal with damage to an artifact.
Last week I was
changing one of those pesky burned-out light bulbs in an exhibit case. While I was in the case, I took the
opportunity to inspect the two garments that were on display there. Insects, especially moths, are a constant concern
wherever there are textiles on display.
They often start “munching” from the inside of a garment, where they are
not readily visible. Fortunately, I didn’t
discover evidence of any sort of insect infestation.
 |
| Here you can see the quilted green silk lining (which may have originally been black) of a wool Union Hospital Steward’s coat, with black velvet lining at the collar, and hand-stitched buttonholes. This was a very nice coat for its time! |
However, I had to very carefully unbutton the coat
to inspect the lining, and in the process the top button popped off. I was not a happy curator at that moment!
 |
| Here is the front of the coat, showing the missing the top button. |
 |
| The button itself was not damaged; it was the dry-rotted thread that broke. While the button was free, I took a moment to document the markings on the back. As you can see, this button was made in New York by the company Schuyler, Hartley, and Graham. |
My next step was
to report the incident to the museum’s Director, and to document it for the
museum’s records. I noted the missing
button and the date on my artifact data base, and took photos of the coat and
the button. This artifact is owned by
the museum, but if it had been an item on loan to us I would have also reported
to the owner. After that, I was ready to
plan for making the repair. I had sewing
needles and cotton thread in my supplies for occasions like this. I opened the case again to get to the jacket
one morning before the museum was open so that I didn’t have to worry about
visitors coming through while I was working!
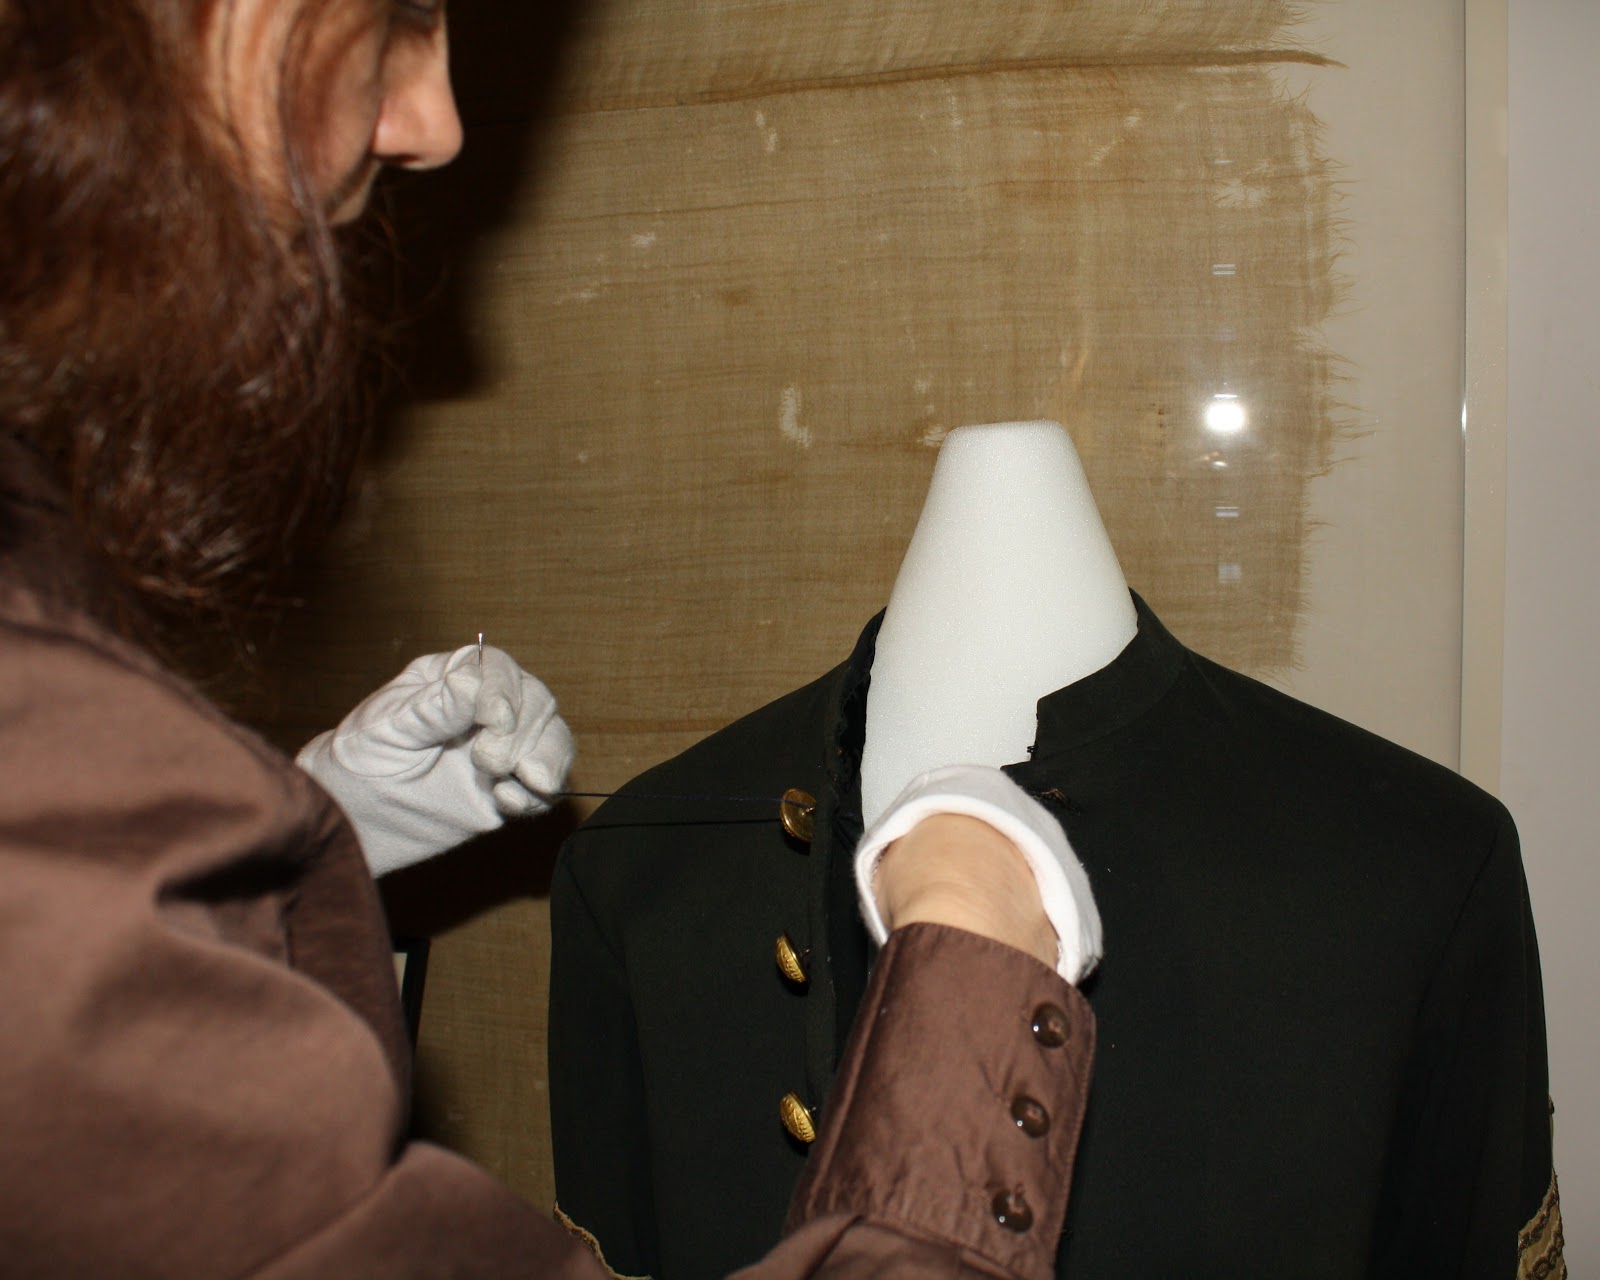 |
| Here I am sewing on the button. Though normally this is a fairly simple task, the gloves made it a little more challenging! For a different kind of button or for a simple repair just to the fabric I may have chosen not to wear the gloves. It is better to handle metal items, like this brass button, with gloves. |
While examining
the coat, I had also noticed some puckering of the fabric along the front – you
may be able to see this in one of the previous photos. This coat has a somewhat rounded front,
which is typical of other men’s coats of the period. The form for the coat was not offering enough
support to the fabric at the chest.
Since the coat was already unbuttoned, it was a good time to add a
little extra padding underneath.
 |
| I just added some layers of cotton batting to the front of the form, so that the coat wouldn’t pucker. I was careful not to add enough to put stress on the buttons and buttonholes though. |
 |
| And here’s the coat, now with a little extra padding and with its button back in place! |
Though I would
have preferred the button to have remained attached, I am glad that it was a
simple repair, and that many more visitors will be able to see and enjoy
this beautiful coat.
Photos courtesy of the
National Museum of Civil War Medicine.
Looking at the bright side, now the coat is better fitted and it shows the dove-chested, narrow-hipped style so popular at the time. Lookin'good!
ReplyDelete