Normally when I put together an exhibit I
work with artifacts which go inside the display cases, and reproductions of
artifacts for what we call the immersion displays. Usually the reproduction items are things
like uniforms for the mannequins, Civil War period furniture, and surgical kits
and instruments which can be purchased from various sources, or donated by
generous museum patrons! Sometimes
though, I have to get creative and make them myself.
Recently, it was decided that we needed to
upgrade a portion of our Pavilion Hospital gallery. This gallery depicts part of a fixed-bed
hospital, complete with hospital beds, patients, a Sisters of Charity nurse, a
surgeon, and a hospital steward.
First, some appropriate bottles were purchased,
and then I had to work on creating the labels and the contents.
The labels were easy, since our Education
Department had already reproduced some labels from Civil War medical bottles to
use with some of their props.
 |
| Here are some of the reproduction labels on some of the bottles and a tin. |
 |
| For comparison, this is one of the original labels on an original medical bottle. |
The more difficult task was reproducing
the contents of the medicine bottles. I
obviously couldn’t use real drugs! I
also couldn’t use any materials which could cause damage to the exhibit if they
spilled, or which could attract insects.
I tackled the powders first. Baking soda worked for most of them, and was
fairly easily dyed various colors using food coloring. I would put the baking soda into a sealable
plastic bag, add the food coloring, and knead the bag until the color was
uniformly distributed. Tartar emetic can
be simulated using plain baking soda, and potassium iodide can be simulated using
baking soda tinted with some red food coloring.
Crystals were mimicked using salt. I used rock salt for the larger crystals, and
table salt for the small crystals. I
found that the table salt could be colored in the same manner as the baking
powder. Rock salt can be used to
simulate silver nitrate, while table salt can be used for sugar.
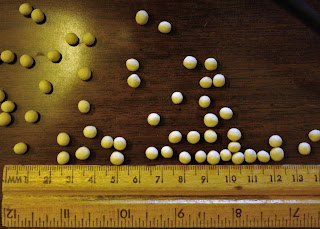
For the pills, I found that white air-dry
clay worked the best. The clay was reasonably
easy to handle, could also be colored with food coloring, and I didn’t have to
deal with baking it. I have to admit
that I felt a little silly sitting in my office rolling out little balls of
clay though! White pills were used to
simulate ipecac and cathartic pills.
Blue pills were used for “blue mass” or mercury pills.
 |
| Here is my first batch of fake pills! |
The liquids were the hardest to simulate. I did not want any actual liquids in the
display, since there would be too much chance of them leaking or being spilled. I ended up using a clear two-step resin to
simulate liquids in the bottles. I used
a clear resin to simulate alcohol and a darker one to simulate iodine.
 |
| I did have to take this one to my work room, as it required more ventilation. |
 |
| The resin worked well, and the labels seen on the backs of the bottles won’t be visible once I put labels on the fronts. |
 |
| And, here are some of the finished bottles. You can see that I was able to use one real ingredient – the coffee! |
So, now our pharmacy cabinet has a much
more accurate appearance. Just don’t try
to sample any of the medicines!
Photos courtesy of the National
Museum of Civil War Medicine.


Very creative! We may be doing a similar display, and you've provided some valuable information! Thank you!
ReplyDeleteGreat work! I have been doing medical impressions (various time periods) for about ten years now. One suggestion: the sash on the figure should be green for medical staff, not red.
ReplyDeleteNo the hospital steward is a NCO not a surgeon the red sash is regulation
Delete